app실행시 폰에 simple server를 하나 돌리고, url을 등록한다.
그러면 서버에서 폰에 web hook을 보낼 때 해당 url에 전송하고, url에 request가 왔을 때 alert를 띄우는 기능이 되겠다.
이렇게 하려고했더니 자료가 잘 없다.
몇년전까지 android에서 nanohttpd라는 것을 사용한 것 같다.
확실히 nanohttpd git을 보니 몇년 전까지만 업데이트되었다.
kotlin으로 구현된 http server api를 발견하였지만 난 java니까 패스...
빠르게 nanohttpd를 사용해본다.
1. build.gradle(Module)에 아래 내용 추가
implementation 'com.nanohttpd:nanohttpd-webserver:2.1.1'이렇게 하면 android studio에서 해당 패키지를 빌드해준다.
2. nano httpd 코드구현
먼저 MainActivity class에 아래 내용을 추가.
/* tiny web server */
private WebServer server;
private static final String TAG = "tinyServer";
private static final int PORT = 8080;

private class WebServer extends NanoHTTPD {

        public WebServer()
        {
            super(PORT);
        }

        @Override
        public Response serve(String uri, Method method,
                              Map<String, String> header,
                              Map<String, String> parameters,
                              Map<String, String> files) {
            String answer = "nano test";


            return new NanoHTTPD.Response(answer);
        }
}

@Override
public void onDestroy()
{
    super.onDestroy();
    if (server != null)
        server.stop();
}
onCreate함수에 server를 생성하는 코드 추가
/* start tiny web server */
server = new WebServer();
try {
    server.start();
} catch(IOException ioe) {
    Log.w("Httpd", "The server could not start.");
}
Log.i("Httpd", "Web server initialized.");
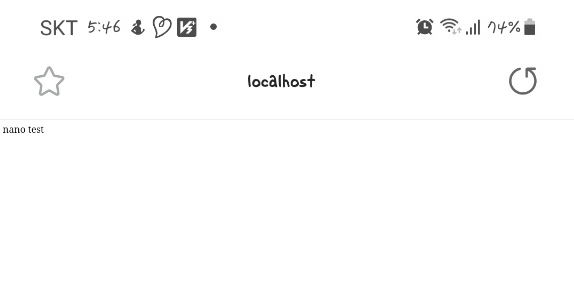
이렇게 해서 어플 실행시키고 web browser에 http://localhost:8080/ 입력하면 http response에 입력한 내용이 나옴.

3. web hook 구현
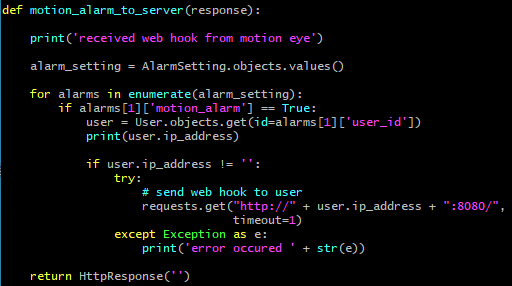
motion eye -> django 에 web hook이 들어오면 django에서는 alarm on이 되어있는 mac address들에게 web hook을 전송해야 한다.
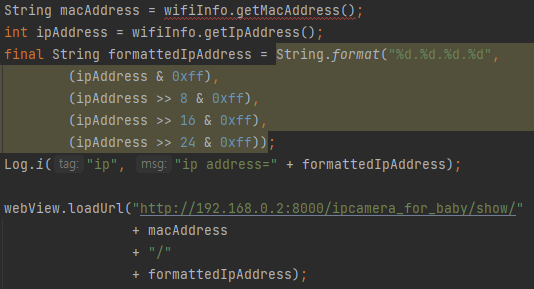
내가 놓친게 있네. 최초 webpage open시 ip address를 서버에 알려주고,
서버에서 ip address를 저장하고 있다가 alarm보낼 때 해당 ip로 보내도록 구현.
그래서 django server쪽 model에 ip address를 저장하도록 구현.
url에 ip address를 추가했고, android code에서도 ip address를 실어보낼 수 있도록 구현.

django로부터 web hook이 들어왔을 때 mac address와 매칭되는 ip address에 get request를 보내도록 구현.

4. notification 구현
build.gradle dependency에 아래 내용 추가
implementation "com.android.support:support-compat:28.0.0"
MainActivity.java에 추가할 내용.
먼저 MainActivity class에 추가해준다.
android 몇버전 이상부터는 channel이 필요하다는데, 그래서 필요한 id를 적어줌.
그리고 알람이 울릴 때 필요한 sound도 추가.
String CHANNEL_ID = "ch1";
Uri alarm_sound = RingtoneManager.getDefaultUri(RingtoneManager.TYPE_ALARM);
다음으로 필요한 함수 두개.
위에서 언급한대로 channel이 필요하므로 channel 생성하는 함수 구현.
너무 복붙한 티 남.ㅋㅋㅋ
private void createNotificationChannel() {
    // Create the NotificationChannel, but only on API 26+ because
    // the NotificationChannel class is new and not in the support library
    if (Build.VERSION.SDK_INT >= Build.VERSION_CODES.O) {
        CharSequence name = "ch1";
        String description = "noti channel";
        int importance = NotificationManager.IMPORTANCE_DEFAULT;
        NotificationChannel channel = new NotificationChannel(CHANNEL_ID, name, importance);
        channel.setDescription(description);
        // Register the channel with the system; you can't change the importance
        // or other notification behaviors after this
        NotificationManager notificationManager = getSystemService(NotificationManager.class);
        notificationManager.createNotificationChannel(channel);
    }
}
다음으로 notification을 띄우는 함수 구현.
역시 복붙의 냄새..ㅋㅋ
protected void showNotification(String alarm_category) {
    Log.i("Start", "notification !!!! ");

    NotificationCompat.Builder builder = new NotificationCompat.Builder(this, CHANNEL_ID)
            .setSmallIcon(androidx.transition.R.drawable.notification_action_background)
            .setContentTitle(alarm_category + "detected !!!!")
            .setSound(alarm_sound)
            .setPriority(NotificationCompat.PRIORITY_HIGH);

    NotificationManagerCompat notificationManager = NotificationManagerCompat.from(this);

    // notificationId is a unique int for each notification that you must define
    Integer notificationId = 1;
    notificationManager.notify(notificationId, builder.build());
}
아무튼 이렇게 해서 channel을 생성하는 함수는 onCreate에 넣어주고,
notification을 띄워주는 함수는 get request가 왔을 때 처리하도록 넣어주었다.
아래는 최종 response 함수의 모양이다.
public Response serve(String uri, Method method,
                      Map<String, String> header,
                      Map<String, String> parameters,
                      Map<String, String> files) {

    uri = uri.split("/")[1];

    if(uri.compareTo("motion") == 0)
        showNotification("motion");
    else if(uri.compareTo("sound") == 0)
        showNotification("sound");
    else
        Log.w("response", "alarm is not in category");

    String answer = "nano test";

    return new NanoHTTPD.Response(answer);
}
uri에 get request시 입력한 url이 들어와서 구분할 수 있도록 분기문을 넣어주었다.
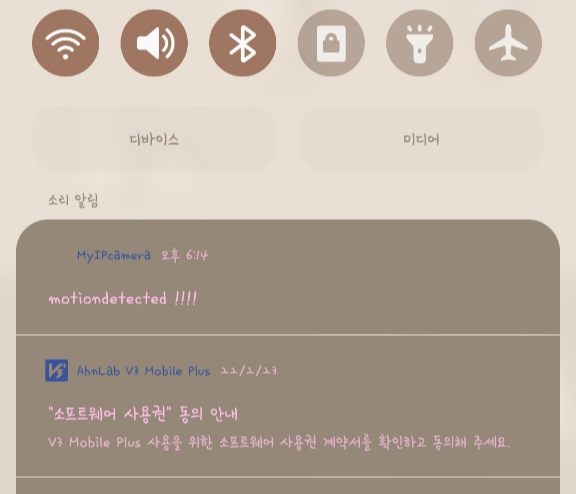
이렇게 해서 알람이 오면 핸드폰에 notification으로 뜬다.

아이콘도 없고 초라하지만 알람 소리는 나서 제 기능은 할 것 같다.
notification 기본 sound여서 좀 구별될 수 있는 소리로 바꿔봐야겠다.
'개발Study > IP Camera' 카테고리의 다른 글
| make IP camera using raspberry pi 4 (14) sound detecting (0) | 2022.03.02 |
|---|---|
| make IP camera using raspberry pi 4 (11) responsive web UI (0) | 2022.02.22 |
| make IP camera using raspberry pi 4 (12) android app (0) | 2022.02.21 |
| make IP camera using raspberry pi 4 (10) android web view (0) | 2022.02.21 |
| make IP camera using raspberry pi 4 (9) motion alarm setting (0) | 2022.02.20 |


댓글